Last Updated on December 24, 2025 by gaojie
What “remove words from image” really means (and why it sometimes looks blurry)
When people say “remove words,” they usually mean one of these:
- Overlay text (like a caption you added in an app)
- Burned-in text (the letters are part of the pixels—like a watermark, timestamp, meme text, or printed label photographed on a product)
Overlay text is easy: you can often edit the original file or remove the text layer. Burned-in text is harder: the pixels behind the words are missing. Any tool has to rebuild what should be there.
Most modern “remove writing from photo” tools use AI inpainting (a smart fill) to guess what’s behind the text and blend it in. That’s why tools like Cleanup.pictures describe their AI as reconstructing what was behind an unwanted object/text.
So why does it blur?
- The tool didn’t have enough surrounding texture to copy.
- You selected too much area at once.
- The background is complex (hair, fabric patterns, tiny letters, brick walls).
- The image is low resolution (there isn’t much detail to rebuild).
The fix isn’t “find a magic tool.” It’s usually change how you brush/mark the area.
Quick permission check (so you don’t create legal headaches)
Removing text is common and often totally normal—like cleaning up your own product photos, deleting a date stamp on family pictures, or removing a typo from a screenshot.
But removing a watermark from someone else’s copyrighted image (especially to repost or sell) can cross legal lines. In the U.S., copyright law includes rules about removing or altering “copyright management information” in certain situations (17 U.S.C. § 1202).
Keep it simple:
- OK: your own images, or images you have permission/license to edit
- OK: client assets where the client has rights and asked you to clean them
- Not OK: removing a watermark to avoid paying for stock or to steal a creator’s work
If the watermark exists because you’re using licensed stock, the right move is usually to buy the license instead of trying to erase it. Canva, for example, explains that Pro content may be watermarked and you remove that watermark by purchasing a license.
Choose the right method in 10 seconds
Use this quick rule:
- You want fast + good enough → AI tool in a browser (best for most people)
- You’re on your phone → iPhone/Google Photos/Samsung eraser tools
- You need perfect edges (logos, product lines, face details) → Photoshop/Photopea
Now let’s do each one.
Method 1: Remove words from image online (fastest for most people)
Most “remove text from image online free” tools work the same way:
- Upload the image
- Brush/paint over the words
- Let the AI rebuild the area
- Download
A practical workflow (works on almost any AI eraser)
Step 1 — Zoom in before you brush
Don’t paint at 100% view. Zoom in so your brush is precise.
Step 2 — Paint only what you must remove
A common mistake is brushing a huge rectangle. That forces the AI to invent too much. Paint the letters tightly, and leave the clean background alone.
Step 3 — Include a tiny bit of surrounding texture
If you paint only the letters, the AI may not have enough context. Lightly include 1–2 pixels of the background around the edges.
Step 4 — Do it in small passes
If the text is long, erase it in sections. Two or three small “heals” usually look cleaner than one big one.
Step 5 — Check the result at 100%
If it looks fine only when zoomed out, it’s not really fixed.
Where GStory fits (natural, SEO-friendly insert)
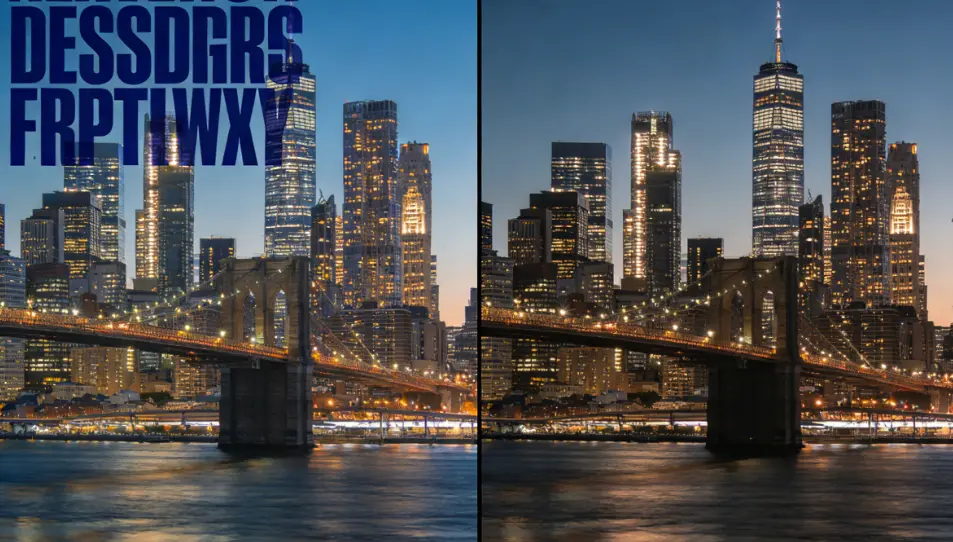
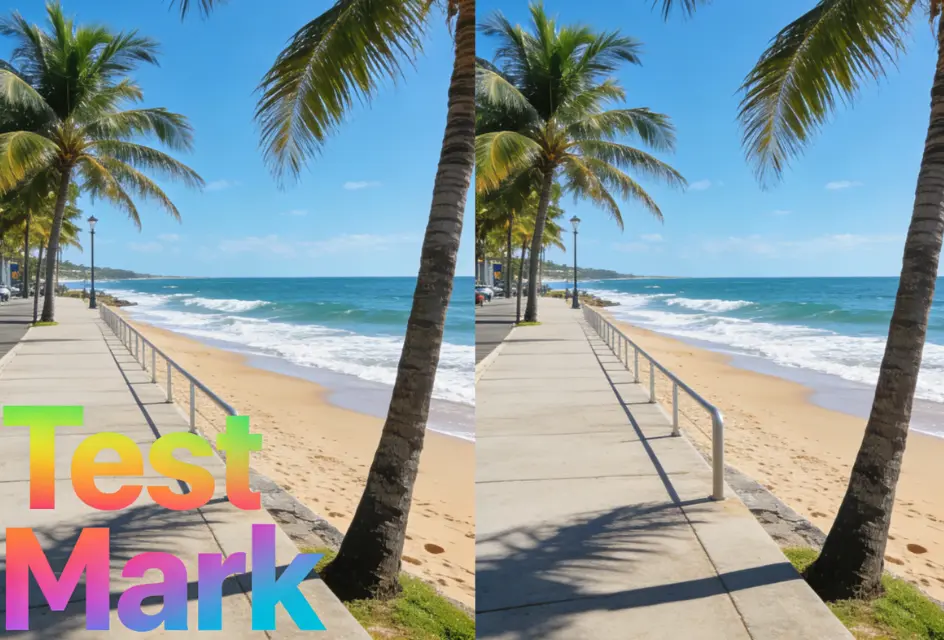
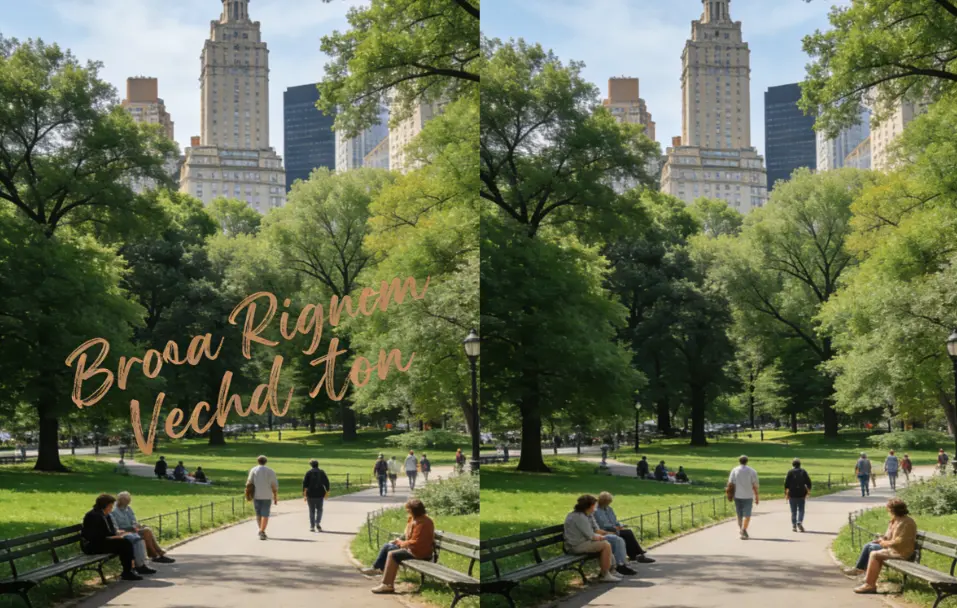
If the words you want to remove are basically acting like a watermark / logo / stamped text, you can use an AI watermark remover tool that’s built for that job.
GStory’s Photo Watermark Remover lets you upload an image (it supports PNG/JPG/JPEG/WEBP up to 10MB), then paint over the watermark/text area and let the AI generate a natural-looking fill.
Here’s the page if you want to try it: GStory photo watermark remover.
GStory also notes new users get free credits after signup, which is helpful if you’re testing multiple photos.
What about Canva / Clipdrop / Cleanup.pictures?
They’re popular for the same reason: they’re quick.
- Canva promotes an AI approach that removes text “without affecting the background,” which matches what most people want.
- Clipdrop and Cleanup.pictures are also widely used “drop in, erase, download” tools.
You don’t need to obsess over the brand. The technique (small, careful passes) matters more than which button you click.
Method 2: Remove words from a picture on your phone
Sometimes the best tool is the one already on your phone—especially for quick cleanup.
iPhone: Photos “Clean Up” (Apple Intelligence)
Apple’s own guide shows the workflow: open Photos → Edit → Clean Up → tap/brush/circle what you want to remove → Done.
Apple also notes Clean Up isn’t available in all regions/languages and depends on device requirements.
Tip: If you’re removing text near a face or important detail, do tiny strokes. Big brushes can create a “plastic” patch.
Google Photos: Magic Eraser
Google Photos highlights Magic Eraser as a way to remove distractions in a few taps.
If you already use Google Photos, this is often the fastest “remove writing from photo” option.
Samsung: Object Eraser
Samsung has an Object Eraser feature for removing unwanted elements from photos (availability depends on model/software).
Phone reality check:
Mobile tools are great, but they’re not always perfect for:
- repeating patterns (fabric, fences)
- sharp logos on product edges
- small detailed text
If it looks “almost right,” you can finish the last 10% with an online tool or desktop editor.
Method 3: Photoshop (or Photopea) when you need cleaner edges
If you care about clean lines—like product photos, packaging, architecture—Photoshop-style tools can look more natural.
The common tools:
- Content-Aware Fill
- Remove Tool / Healing Brush
- Clone Stamp (best when AI keeps guessing wrong)
A beginner-friendly Photoshop flow
- Duplicate your layer (always keep an original)
- Lasso/select only the text area (tight selection)
- Use Content-Aware Fill or Healing
- If it smears, undo and switch to Clone Stamp for that section
Why Photoshop sometimes wins:
You can control where the replacement texture comes from. AI tools guess. Clone Stamp chooses.
How to remove words from image without blur (the tiny technique that changes everything)
If you take only one tip from this guide, take this:
The “small brush + two passes” rule
Pass 1: Remove only the darkest parts of the letters.
Pass 2: Clean the leftovers with a smaller brush.
Why it works:
- The AI does less guessing at once.
- You keep more real background detail.
- It reduces the “wet paint” blur look.
Also:
- If text sits on a hard edge (like a product outline), erase the edge last, in a separate pass.
- If the background has a pattern, match direction: brush strokes should follow the pattern, not cut across it.
Troubleshooting: when the result still looks fake
Problem: “It left a blurry patch”
Try:
- smaller brush
- erase in sections
- include a tiny border of background
- run one more pass after the first fix (many tools improve on the second try)
Problem: “The background pattern broke” (fabric, brick, wood)
Try:
- reduce the selection to a single word at a time
- use Photoshop Clone Stamp for pattern areas
- if you’re online: erase shorter segments so the AI can follow the pattern
Problem: “Text is on hair / eyelashes / face”
This is the hardest case. Do not expect one click.
Try:
- extremely small brush
- multiple passes
- Photoshop for final cleanup
Problem: “It’s a transparent watermark across the whole image”
Be realistic: a giant watermark that covers everything means the original pixels are heavily damaged. AI can guess, but it may never look perfect at full zoom.
If you need professional results, the best solution is still: get the licensed original.
Common real-life use cases (and the best method for each)
E-commerce sellers: remove price stickers, old promo text, supplier marks
→ Online AI tool first; Photoshop for edges
Creators: remove captions burned into screenshots, clean thumbnails
→ Phone eraser for quick; online tool for better quality
Parents: remove timestamps, messy scribbles on photos
→ Phone eraser is often enough
Work screenshots: remove names, emails, addresses
→ Don’t use AI “eraser” as privacy redaction. Use solid blocks or a proper redaction tool. AI can sometimes leave readable traces.
FAQ (written for real searches)
“Can I remove text from image online free?”
Often yes—many tools offer a free tier or free credits. GStory, for example, states new users get free credits on signup.
“Will removing words from a picture reduce quality?”
It can, especially if the tool exports a smaller file. Always download the highest-quality option available and check at 100%.
“How do I remove words from image without removing background?”
Use an AI inpainting approach (brush over the words; let it rebuild). Canva also describes this goal directly: removing text without affecting the background.
The key is brushing small areas and doing multiple passes.
“Is it okay to remove a watermark from a photo?”
If you own the image or have permission/license, usually yes. If you don’t, it can be legally risky (and ethically not great).
A clean, repeatable workflow (save this)
- Decide if you’re allowed to remove it (rights/license check)
- Start with the fastest method (online AI or phone eraser)
- Erase in small passes, not one big wipe
- Check at 100% zoom
- If edges/patterns look off, finish in Photoshop/Photopea
If your main pain is watermarks, logos, or stamped text and you want a browser-first path, you can try the GStory photo watermark remover and follow the “small brush + two passes” rule for the cleanest result.
Leave a Reply