
Last Updated on December 5, 2025 by Xu Yue
You know that moment when you finally rewatch a “once-in-a-lifetime” clip—your kid’s first school show, a surprise proposal, or that idol concert you queued six hours for—only to discover the video looks like it was filmed inside a bowl of rice?
Grain everywhere. Faces melted. Background a noisy mess.
Most people do the same thing next: Google “denoise video,” throw a random filter on it, and end up with something slightly less noisy… but also weirdly blurry, plastic, and dead.
This guide is here to stop that cycle.
We’re going to walk through why video is grainy, why many “noisy footage fix” attempts fail, how to denoise video without killing detail, and when it actually makes sense to use AI video noise reduction or denoise video online free tools instead of wrestling with complex plugins.
Along the way, I’ll also show you where GStory’s AI Video Enhancer fits in as a fast, browser-based option when you need clean footage right now.
Why Video Is Grainy – Core Video Noise Causes
Before you can denoise video properly, you need to understand what you’re fighting. “Noise” isn’t just your camera being bad; it’s the visual side effect of physics, electronics, and compression.
Digital sensors and low light
Digital camera sensors work by collecting photons (light) at each pixel. In bright light, each pixel gets a strong signal; tiny random variations don’t matter much. In low light, the signal is weak and random variations (noise) become a big part of the picture. That’s why low-light shots tend to get noisy even on good cameras.
In other words:
- Low light → low signal
- Electronics → constant background noise
- When the signal is weak, the signal-to-noise ratio drops and grain becomes visible.
So if you’re trying to fix low light grain, you’re really trying to undo the physics of not having enough light to begin with. Post-production can help, but it’s always working with limited information.
ISO, gain, and compression
To make a dark scene brighter, your camera raises ISO (or gain on some devices). This doesn’t magically generate more light; it amplifies the signal and the noise together. High ISO = more visible noise.
Then there’s compression:
- Video is usually recorded at a limited bitrate.
- The encoder tries to save space by grouping areas together.
- Noise looks like random, high-frequency detail, which is hard to compress cleanly.
- The result: blocky, shimmering patterns and mosquito noise in dark or flat areas.
If the bitrate is too low, your attempt to reduce grain in video later may also reveal ugly compression blocks.
Why smartphone clips are extra noisy
Smartphone cameras are miracles… but also tiny:
- Very small sensors → less light per pixel
- Very small lenses → less light overall
- Aggressive sharpening and local contrast added by the phone to “fake” detail
- Strong compression to keep file sizes small
All of that means that if you shoot at night, your phone is basically screaming, “I have no light, I’m guessing a lot,” and then applying sharpening on top of that. That’s why phone footage in the dark often looks like a noisy watercolor painting.
So if you’ve ever asked “why is my video so grainy?” — the short answer is: because your camera didn’t have enough clean signal to work with.
Noisy Footage Fix Myths That Ruin Your Image
Once people notice noise, they usually go hunting for a “magic” noise reduction slider. That’s where things often go wrong.
Overdoing noise reduction
Most basic noise reduction tools (including many built-ins) work like this:
- Detect fine, high-frequency details
- Blur or smooth them until the noise isn’t visible
If you push the slider too far to clean up video noise, you don’t just remove noise — you also remove real texture:
- Skin turns into wax
- Hair becomes a blur
- Background detail disappears
On forums like r/premiere and VFX communities, editors regularly complain that heavy denoising turns their footage into a “plastic mess” that looks worse than the original noisy clip.
The myth: “If some noise reduction is good, more must be better.”
Reality: past a certain point, every extra bit of noise reduction removes real detail you can never get back.
Motion noise vs static noise
Most denoisers behave very differently on:
- Static shots (tripod, not much moving)
- Motion-heavy shots (handheld, fast movement, shaky phone video)
Static shots are easier: the denoiser can compare multiple frames and average out random noise over time while keeping edges and shapes mostly intact.
Motion is where many tools struggle:
- Subjects move between frames → the denoiser can’t line them up perfectly
- Motion blur + noise = mushy edges
- Algorithms may smear moving objects or leave ghost trails
That’s why many editors say they can denoise an interview shot on a tripod just fine, but any handheld B-roll becomes a nightmare.
Plastic skin, banding, and ghosting
When noise reduction is pushed too hard, or when the algorithm isn’t motion-aware, you’ll often see:
- Plastic skin – faces look airbrushed and flat
- Banding – smooth gradients (like skies) break into visible steps
- Ghosting – faint “echoes” of movement between frames
These artifacts are usually worse than the original noise, especially in 4K or big-screen viewing. That’s why the goal isn’t just “denoise video,” but denoise video without losing detail.
How to Remove Video Noise with the Right Tools
Once you understand the limits, you can choose tools that match your level, budget, and deadline.
Limits of built-in “denoise video Premiere”
Premiere Pro does include tools that can help:
- A basic Reduce Noise effect for some footage
- The VR Digital Noise effect
- Integration with third-party plugins like Neat Video
But built-in Premiere noise reduction has limitations:
- Few controls compared to dedicated noise filtration plugins
- Can be slow and render-heavy on weaker machines
- Easy to overdo, leading to soft or smeared images
They’re fine for subtle cleanup, but if your clip is a high-ISO, low-light, handheld shot, Premiere alone often can’t take you from “unusable” to “client-ready.”
Neat Video and other pro noise filtration plugins
Tools like Neat Video are considered the gold standard for advanced noise reduction. Neat Video analyzes a sample area of the frame, builds a noise profile, and then reduces noise using both spatial (per-frame) and temporal (across frames) data.
Pros:
- Extremely powerful noise filtration
- Very detailed control over how much to reduce and where
- Supports many hosts: Premiere Pro, DaVinci Resolve, Final Cut, etc.
Cons:
- Paid, not cheap
- Lots of settings; beginners can feel overwhelmed
- Heavy on CPU/GPU, especially in 4K
If you’re a professional editor with time to learn it, Neat Video is fantastic. If you just want to denoise video online free and move on, it can feel like using a rocket to heat your lunch.
Remove video noise AI and modern AI video noise reduction
In the last few years, many tools have started using AI video noise reduction:
- Fotor‘s AI video denoiser lets you denoise video online and remove grain with one click, focusing on low-light and compression noise.
- AVCLabs Online Video Denoiser uses AI to automatically analyze and remove different noise types in a single click.
- Media.io‘s video denoiser lets you denoise video online for free in the browser with automated processing.
These “remove video noise AI” tools trade ultra-fine control for speed and simplicity:
- You upload your clip
- AI analyzes and cleans it
- You download a cleaner version
They’re not always as precise as Neat Video in every scenario, but for a lot of real-world “noisy footage fix” situations, they’re good enough and 10× easier.
Practical Workflows to Reduce Grain in Video
Now let’s turn this into a realistic workflow you can actually use.
Golden rule: denoise before sharpening
A key rule: denoise first, then sharpen.
If you sharpen a noisy clip:
- You also sharpen the noise
- Every grain becomes a tiny white “spark”
- Later noise reduction has to work even harder
By doing noise reduction first, you give your sharpening and upscaling a cleaner base to work on. Many professional low-light workflows follow this order:
- Denoise video (AI or plugin)
- Adjust exposure / contrast
- Color grade
- Sharpen and/or upscale
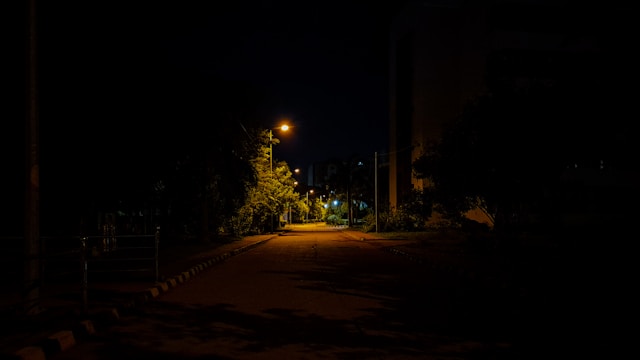
Low-light rescue workflow
For a dark, grainy clip (concert, wedding, nighttime street):
- Denoise video gently to reduce harsh grain while keeping detail
- Lift shadows and add contrast slowly; don’t stretch the signal too much
- Add a bit of saturation and subtle sharpening
- Consider mild vignette to draw attention away from noisy corners
If you try to brighten first and denoise later, you’ll exaggerate the noise and compressions artifacts, making the job harder.
Handling motion-heavy shots
For motion-heavy clips (handheld, gimbal, action):
- Use tools that have temporal noise reduction with motion compensation
- Be conservative with strength to avoid ghosting
- If available, use motion-sensitive settings that protect moving objects
Sometimes it’s better to leave a bit of noise than to obliterate all movement detail. Your viewers will forgive a bit of grain; they won’t forgive smeared faces.
Clean up video noise, then grade
Color grading can hide or reveal noise:
- Pushing shadows up = reveals noise
- Adding heavy saturation = amplifies color noise
That’s why the ideal is: clean up video noise first, then grade with the limitations of your footage in mind. If you know the shadows are already fragile, don’t build your whole look around crushing and re-lifting them repeatedly.
Best Ways to Denoise Video for Different Creators
Different creators have different constraints. There’s no one-size-fits-all “best” denoise workflow.
Vloggers and TikTok creators on the go
Pain points:
- Shooting on phones in bad lighting
- Minimal time for post
- Need to reduce grain in video fast for social uploads
Good options:
- Denoise video online free tools (Fotor, AVCLabs, Media.io, etc.) for one-click cleanup
- Lightweight AI apps that run on mobile
Here, your goal isn’t perfect cinema; it’s “looks clean enough on a phone screen”.
YouTubers and educators with long noisy footage
Pain points:
- Hour-long talking-head videos
- Noisy room / low-light webcam setups
- Tight weekly upload schedule
You need:
- A repeatable how to remove video noise workflow
- Possibly a mix of:
- Moderate denoise + light sharpening
- Mild color correction
- Tools with presets and batch or timeline-wide application
This is where plugins like Neat Video or AI desktop tools shine—once configured, they can clean a whole series of similar clips efficiently.
Wedding and event shooters under bad lighting
Pain points:
- Uncontrolled lighting (LEDs, candles, DJ lights)
- High-ISO shooting to avoid motion blur
- Footage that absolutely cannot be re-shot
The bar is higher here: you want to denoise video without losing detail in dresses, faces, and decor. A common approach:
- Capture as cleanly as possible (fast lenses, careful exposure)
- Use a serious noise filtration tool like Neat Video for the worst clips
- For fast turnaround previews or social cuts, rely on AI video noise reduction or online enhancers to speed up the process
Denoise video online free in the browser
Online tools like Fotor, AVCLabs, Media.io, Picwand, and TensorPix all offer some flavor of denoise video online free, powered by AI.
Typical workflow:
- Upload your clip
- Let AI process it (noise reduction, sometimes brightening and sharpening)
- Download the cleaned version
Pros:
- No software install
- Beginner-friendly
- Great for short social clips and urgent fixes
Cons:
- File size or length limits (often under ~500 MB or ~10 minutes)
- Less control over settings
- Requires good internet and some patience for uploads
When online tools are enough
Use online tools when:
- You’re cleaning relatively short clips
- The footage is noisy but not totally destroyed
- You value speed and simplicity over surgical control
For most creators who just want to clean up video noise for TikTok, Shorts, or quick client previews, denoise video online is more than enough.
When you still need desktop plugins
Desktop plugins and apps are still better when:
- You work with 4K/6K/8K footage regularly
- You need full control (per-channel, per-area noise reduction)
- You’re delivering to picky clients or big screens
Denoise Video Online Free with GStory AI Video Enhancer
Now let’s talk about where GStory fits into this picture.
GStory’s AI Video Enhancer is designed as an all-in-one online video quality booster: it uses AI to improve resolution, sharpness, brightness, and overall clarity, all in your browser—no software download needed.
While it’s positioned as an enhancer rather than a dedicated “denoise video” plugin, in practice AI upscaling and enhancement often reduce the appearance of noise and grain by reconstructing cleaner detail and smoothing problem areas in a more intelligent way than simple blur.
One-click AI video noise reduction and upscale
For many noisy clips, especially low-res or soft smartphone footage:
- You upload your video (up to 500 MB, around 10 minutes)
- Let AI enhancement run
- Download a sharper, cleaner, higher-resolution version
This “enhance + subtle denoise” combo is especially helpful when you want to:
- Make an old, grainy clip look HD or 4K
- Improve clarity without manually tuning noise settings
- Fix low-light social content fast
Simple workflow vs complex pro plugins
You can think of it this way:
- Neat Video, Resolve Studio, etc. = maximum control, steeper learning curve, more time investment
- GStory AI Video Enhancer = maximum convenience, still a big quality jump over straight-out-of-camera noisy clips
They’re not mutually exclusive. You could even:
- Use a dedicated denoiser lightly for the worst noise
- Then send the result through GStory to upscale, sharpen, and polish the final look
Prevent Noise So You Need Less Noise Reduction
The best way to denoise video… is to record cleaner video in the first place.
Exposure, ISO, and lighting basics
A few practical tips:
- Add more light whenever possible — even a small LED panel can drastically reduce noise
- Expose a bit brighter (without clipping highlights), then pull down in post
- Avoid maxing out ISO unless absolutely necessary
More light = better signal-to-noise ratio = less work later.
Camera, codec, and bitrate choices
If you can set these:
- Use the highest reasonable bitrate your camera allows
- Prefer log or flat profiles only if you know how to grade them; they need more care
- Avoid heavy digital zoom, which often amplifies noise and compression artifacts
Cleaner capture settings make every noise reduction step more effective.
When a little noise is okay
Finally, remember: a tiny bit of noise is not the end of the world.
In many cases:
- Mild grain can look natural, almost film-like
- Over-smoothing is more distracting than gentle noise
- Viewers care more about story, emotion, and clarity than pixel-perfect silence in the shadows
Your goal isn’t to annihilate every speck; it’s to denoise video enough that it looks clean and detailed, without turning your subjects into wax figures.
Understand why the noise is there, pick the right tool, follow a smart workflow, and—when speed matters—let AI helpers like GStory AI Video Enhancer do the heavy lifting for you.
Leave a Reply