Last Updated on December 23, 2025 by Leslie
If video editing felt like: “trim a little, add music, export, done”… you wouldn’t be here.
You’re here because something broke.
Your export looks weirdly blurry. Your audio is almost in sync (which is the worst kind of sync). Your footage is shaky, your captions look tiny, and YouTube somehow makes everything look softer than it did in your editor.
So let’s do this the way real creators troubleshoot: pain-point first.
This guide is built around video editing tips that prevent the most common “why is my video doing that?” moments—especially if you’re learning video editing tips for beginners and want a workflow that doesn’t collapse the night before you upload.
Video Editing Tips for Beginners: Build a “Never Breaks” Editing Workflow

Editing is not “drag clips until it looks okay.” Editing is a system. A calm one.
Start with the outcome, not the timeline
Before you touch a single cut, answer one question:
Where will this video live—and what does “success” look like there?
- YouTube long-form: clarity + pacing + “I know what this is in 10 seconds”
- Shorts/Reels/TikTok: punchy visuals + readable captions + fast story turns
- Client/business: clean audio + consistent branding + no weird export issues
This one decision prevents 50 micro-decisions later (“Should I do 4K?” “Should I add subtitles?” “Why is it cropped?”). It’s also the difference between random editing tips and actual video editing advice.
The three-pass edit (rough → tighten → polish)
A lot of beginner editors try to do everything at once. That’s how you end up with a timeline that’s 87% “maybe” clips and 13% panic.
Try three passes:
Pass 1 — Rough:
Put the story in order. Don’t overthink. If it’s “usable,” it goes in.
Pass 2 — Tighten:
Remove dead air, repeats, and “uh” moments. Make your points land faster.
Pass 3 — Polish:
Only now do you touch music, captions, zooms, sound cleanup, color tweaks.
This approach makes your edits feel intentional (and it cuts your total editing time more than any fancy tool).
File naming and project organization that saves hours
This is the least sexy part of video editing tips for beginners… and the most life-saving.
A simple folder structure:
Footage/Audio/Exports/Graphics/Project Files/
And a simple naming rule:
DATE_TOPIC_CAMERA_TAKE
Example: 2025-12-23_ProductDemo_iPhone_Take2.mov
You’re not doing this for “neatness.” You’re doing it because one day you’ll need the one clip where the audio isn’t broken, and Future You deserves happiness.
Editing Tips: Fix the “Something Feels Off” Problems
These are the issues that drive people to forums at 1:13 AM.
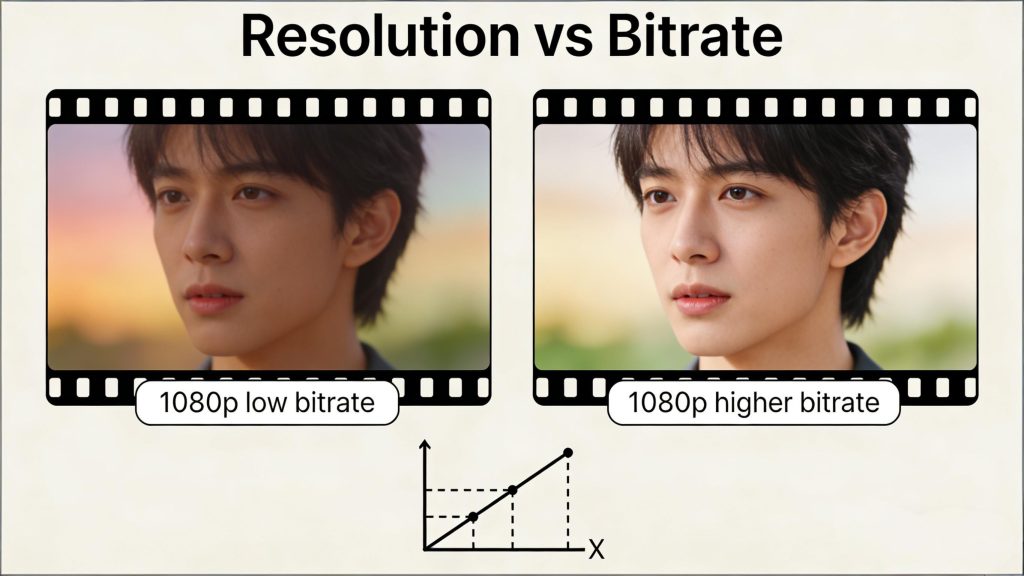
Why exports look blurry (resolution vs bitrate)
If your video looks sharp in the editor but mushy after export, it’s usually one of these:
- Your export resolution doesn’t match your timeline/footage
- Your bitrate is too low for the motion/detail in your video
- The platform recompressed it hard after upload
A practical baseline: when exporting for YouTube, bitrate matters as much as resolution. YouTube publishes recommended upload bitrates by resolution and frame rate (for example, 1080p has different targets for standard vs high frame rate).
Simple fix path:
- Match export resolution to your project (don’t “accidentally” export 720p)
- Keep frame rate consistent (don’t export 30fps if you shot 60fps unless you meant to)
- Use a bitrate that fits the format (YouTube’s table is a solid reference)
Audio out of sync: the fastest troubleshooting path
Audio sync problems feel cursed, but they usually have a cause.
The most common modern culprit: Variable Frame Rate (VFR) footage from phones or screen recordings. Many editors can import it, but long clips may drift out of sync. Adobe community support threads regularly point to VFR as a reason audio goes out of sync and suggest converting to constant frame rate as a fix path.
Apple users hit a similar issue—support replies often mention sample rate mismatches or variable frame rate as likely causes and suggest splitting/re-syncing sections when drift happens.
Fast troubleshooting path:
- If sync is off from the start: check your timeline frame rate matches the clip.
- If sync gets worse over time: suspect VFR → convert to CFR (constant frame rate) before editing.
- If it’s only off after export: check export frame rate + audio sample rate.
This is one of those “boring” video editing tips that saves entire projects.
Motion blur vs shaky footage vs bad focus
These three look similar, but they’re different problems—and the fix changes.
- Motion blur: subject moves fast during the exposure → streaky smear.
Fix: higher shutter speed when shooting; in post, reduce motion blur carefully (but don’t expect miracles). - Shaky footage: camera movement → jittery frame-to-frame shake.
Fix: stabilization (but watch for warping). - Bad focus: the subject is simply not sharp.
Fix: not much, but you can sometimes improve perceived sharpness with careful enhancement.
A lot of “editing tips” online treat these as one thing. They’re not. Diagnose first.
Tips for Editing Videos for YouTube: Retention-First Cuts (Not More Effects)
YouTube rewards clarity and momentum. Not sparkles.
The first 10 seconds: hook + promise
If viewers don’t know what they’re getting, they leave—even if your video is good.
A YouTube-friendly opener:
- Hook: show the problem (or the result)
- Promise: what they’ll learn / get
- Proof: quick credibility (show the before/after, or the finished result)
This is the most important section for tips for editing videos for YouTube because it’s where retention is won or lost.
Pace editing: remove dead air without sounding jumpy
Dead air kills retention. But over-cutting makes you sound like a robot.
Try this:
- Cut pauses that don’t add meaning
- Keep micro-pauses after jokes or important points
- Use B-roll or screen recordings to cover cuts smoothly
A clean pace feels “easy to watch.” That’s the goal.
Turn one long video into Shorts/Clips without losing the story
Short clips fail when they’re just random highlights.
A simple repurpose structure:
- One idea per clip
- Start with the payoff
- End with a tiny loop (“and here’s the mistake people make next…”)
If you do this well, Shorts become “trailers” that push people to the full video.
Video Editing Advice: Edit Faster Without Lowering Quality
Speed comes from systems—not rushing.
Reusable structures (intro/outro, lower-thirds, caption styles)
Make once, reuse forever:
- Intro sequence
- Outro + CTA
- Lower-third style
- Caption style (font size, safe margins, placement)
This is the difference between “editing forever” and having a repeatable workflow.
Batch editing: one session, multiple versions
Instead of finishing one video end-to-end, batch by task:
- Session 1: rough cuts for 3 videos
- Session 2: tighten all 3
- Session 3: captions + polish
Your brain stays in the same “mode,” which is faster and more consistent.
Shortcuts and repeatable “muscle memory” habits
Pick 5 shortcuts you use constantly (cut, ripple delete, split, zoom timeline, play/stop). Practice them until they’re automatic.
It sounds small. It’s huge.
Tips on Editing Videos: Audio, Captions, and Platform Specs That Don’t Backfire
This is where “looks fine on my laptop” turns into “why is it unreadable on a phone?”
Voice clarity basics (loudness, noise, consistency)
People forgive mediocre video. They don’t forgive painful audio.
Your goal isn’t “loud.” It’s consistent.
A useful concept is LUFS, a standard way to measure perceived loudness (not just peak volume). Google’s documentation explains LUFS/LKFS as a normalization standard used to avoid big loudness jumps.
Practical editing advice:
- Remove obvious hum/noise first
- Even out volume (light compression helps)
- Avoid clipping (distortion is forever)
Captions that people actually read
Captions fail when they’re:
- too small
- too fast
- too many words per line
Aim for short lines, natural breaks, and safe margins (don’t hug the bottom edge—UI buttons will cover it).
Upload specs: 1080p vs 4K, frame rate, and safe defaults
If you’re unsure, a safe default for most creators is:
- Export at the same frame rate you shot
- 1080p or 4K depending on your footage
- Use YouTube’s bitrate guidance as your reality check
“Higher resolution” doesn’t fix a low-bitrate export. It can actually make it worse.
AI-Powered Video Editing Tips: Offload the Fixing Work to Automation
AI won’t replace editing taste—but it can absolutely replace some grinding.
AI enhancement: denoise, sharpen, upscale
If your footage is noisy, soft, or low-res, enhancement can help—especially for social content where “good enough” is the target.
GStory’s AI Video Enhancer is built specifically for this kind of repair: improving clarity, reducing noise/motion blur, and upscaling (including positioning itself as a one-click workflow).
Auto captions and translation for reach
Captions aren’t just accessibility—they’re retention.
GStory’s Subtitle Generator supports auto captions/transcription and export formats like SRT/VTT/TXT, and it also mentions an “up to 95% accuracy” claim (which you should treat as “best-case” and still review).
If you’re making YouTube content, this is one of the highest-ROI automations you can add.
A pre-upload “preflight” check to catch quality killers
Before you upload, do a 60-second preflight:
- Watch at 1.25x speed (you’ll spot pacing issues fast)
- Listen on phone speakers (audio problems jump out)
- Check captions on mobile (readability test)
- Confirm export settings (resolution/frame rate/bitrate)
This tiny ritual prevents the classic “why is it blurry after upload?” spiral.
Bonus: Where GStory Fits in This Workflow
If your main pain is quality cleanup and speed, GStory can plug into your workflow without replacing your editor.
GStory Video Enhancer (quality repair and enhancement)
Use GStory Video Enhancer when your problem is “the footage is usable, but it looks rough”—noise, softness, low-res, or dull clarity.
GStory Subtitle Generator (captions, transcription, translation)
Use GStory Subtitle Generator when your pain is “captions take forever” or “I need a clean subtitle file fast.” It supports uploading files (and even mentions pasting a YouTube URL in its workflow).
Leave a Reply