Last Updated on September 19, 2025 by Leslie
Video filters are everywhere—on TikTok, Instagram, YouTube Shorts, and almost every vlog or product demo you see. These filters for videos can instantly change how your content feels, make dull footage pop, or give your clips a consistent, polished aesthetic.
But filters aren’t always the answer. Used well, they enhance your story. Used carelessly, they can distract, distort, or even damage your message. If you’ve ever added a trendy filter and ended up with oversaturated colors or orange skin tones, you know what we mean.
In this guide, we’ll explore how to use video filters the right way—whether you’re editing on a laptop, applying effects on your phone, or considering whether a filter is even necessary in the first place.
What Exactly Is a Video Filter?
A filter for video is a pre-designed visual effect that changes the look of your footage. It can adjust color, contrast, brightness, sharpness, and more—all in a single tap or click. Most video editor filters fall into one of three categories:
- Stylistic: These give your video a certain mood—retro, cinematic, dreamy, or dramatic.
- Corrective: These help fix lighting, white balance, or exposure problems.
- Fun: Think dog ears, face distortions, and sparkles—popular in short-form and social content.
Many editing apps come with a large library of built-in filters. Some are designed for subtle changes; others are bold and attention-grabbing. Understanding what you want your video to feel like is the first step in choosing the right filter—if you even need one at all.
Filters for Videos: Real-Time vs Post-Production Tools
Not all filters are added the same way. Some are applied before recording, while others come in during editing. Each method has its pros and limitations.
Real-time filters are common in apps like Instagram or WhatsApp. They let you preview and apply effects while recording, or even during a live call. They’re quick and fun, but not very customizable. And since they often reduce video quality to keep things real-time, your footage might end up blurry or compressed.
Post-production video filters, on the other hand, are used after recording. This is where video editor filters in tools like CapCut, Filmora, or Clipchamp come in. These editors let you apply video effects for video editing with far more control and customization. You can adjust the intensity, try out multiple styles, or even combine filters for a unique look.
If you’re aiming for quality and flexibility, post-production filters are the better choice. They also allow you to tweak individual clips differently within the same project, which is useful if your lighting or setting changes from scene to scene.
How to Add a Filter for Video Editing Without Overdoing It
Applying a filter online is easy. Making it look good takes a bit more thought. Here’s a quick step-by-step if you’re using a typical filters online editor like CapCut or Clipchamp:
- Upload your video to the editor.
- Open the filter or effects tab.
- Browse through available styles and preview a few.
- Adjust the intensity if the option exists.
- Export your video once you’re satisfied with the look.
A common mistake is applying a filter at full strength. Even the best-designed effects can look off if they’re too intense. Always preview your video from start to finish to catch any weird lighting or skin tone shifts.
Also, remember that one filter doesn’t have to fit your entire video. If you’re editing a vlog, you might use different filters for indoor and outdoor shots—or apply none at all where natural lighting looks better on its own.
YouTube and Filters: What You Can and Can’t Do
One of the most searched filter-related questions is how to apply filters to YouTube videos. Here’s the short answer: you can’t.
YouTube doesn’t offer built-in filters once a video is uploaded. If you want your video to have a certain look, you’ll need to apply filters before uploading using a third-party editor. This makes your editing choices even more important—once your video is live, there’s no way to change how it looks without taking it down and re-uploading a new version.
So whether you’re creating content for YouTube, TikTok, or Instagram, think of filters as part of your editing workflow—not a last-minute fix.
Not Every Video Needs a Filter—And That’s Okay
It’s easy to get into the habit of using filters by default. After all, most editing apps place them front and center. But sometimes, what your video actually needs isn’t a filter—it’s better lighting, sharper clarity, or more balanced colors.
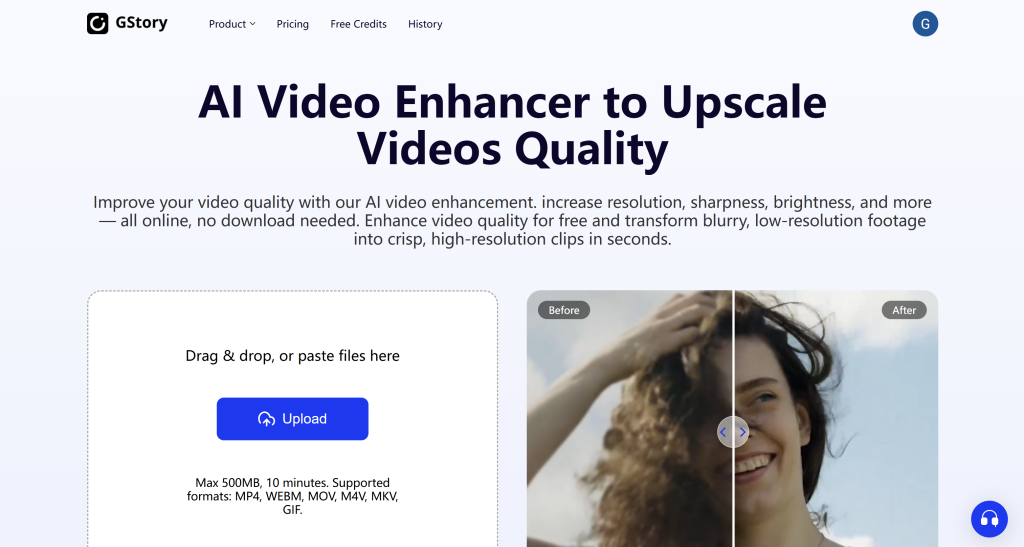
That’s where video enhancement tools come in. Instead of applying a stylistic overlay, enhancement software focuses on improving the technical quality of your footage. It’s a quieter, less flashy kind of upgrade—but often a more effective one.
GStory’s AI Video Enhancer is built for this exact use case. Instead of relying on traditional filters, it uses AI filters that analyze your video, detect issues like dull contrast, underexposed scenes, or flat colors, and intelligently boost the visuals. You don’t need to adjust sliders or pick between dozens of looks. Just upload your footage and let the tool handle it.
This can be especially useful for videos where filters might feel inappropriate: tutorials, interviews, product demos, or anything where visual clarity matters more than stylized mood.
Creative Uses of Video Effects for Video Editing
Filters work best when they serve a purpose—not when they’re slapped onto every video for no reason. The most engaging content usually has a consistent visual tone, and filters can help with that. But when overused, they can make your content look artificial or dated.
If you’re creating casual social content—like funny clips, memes, or reaction videos—there’s room to be playful. Bold filters, color shifts, and overlays can add humor and keep things fresh. For example, face distortion filters or retro VHS effects often work well in short-form formats like TikTok or Reels.
On the flip side, if you’re building a personal vlog or a travel channel, filters can help establish a recognizable aesthetic. Some creators apply the same warm-toned filter to every clip to create visual consistency, which makes their channel feel more polished. Just be sure to test how your filter looks under different lighting conditions—what works on a beach may not work indoors.
For business or product-focused videos, subtlety matters more. Harsh filters can make colors look inaccurate or distract viewers from what you’re actually showing. In these cases, it’s often better to avoid filters altogether and focus on clarity. This is another scenario where enhancement tools like GStory’s AI engine come in handy. By improving sharpness and color balance without obvious styling, you can create professional-looking content that doesn’t feel edited.
FAQs: What People Are Asking About Video Filters
Let’s tackle some of the most common filter-related questions that show up in search engines. These quick answers can help you avoid beginner mistakes and make smarter editing choices.
Can I add a filter to a video online for free?
Yes. Most online video editors—including CapCut, Clipchamp, and Canva—offer free filters online. Some limit advanced features to paid tiers, but you can apply basic filters for videos and export without paying.
How do I add a filter to a video on YouTube?
You can’t add filters directly on YouTube. You’ll need to edit your video in another app before uploading. Once the video is live, there’s no way to change its appearance unless you re-edit and re-upload.
Is there a way to remove a filter from a video?
Only if you have the original, unfiltered footage. Once a filter is applied and exported, it becomes part of the video file. You might be able to tone it down with color correction or AI enhancement, but you won’t be able to fully restore the original look.
What’s the difference between a filter and enhancement?
Filters are usually visible effects meant to stylize your video. Enhancements focus on improving image quality—like contrast, exposure, or sharpness—without changing the style. GStory’s Video Enhancer falls into the latter category.
Can I use filters during a WhatsApp or Instagram video call?
Yes. Both platforms offer real-time filters you can apply while on a call or recording. These are fun and fast, but the video quality might be lower compared to post-edited footage.
When to Use a Filter—and When to Skip It
There’s no rule that says you must use a filter in every video. In fact, learning to not use one is part of becoming a better editor.
Use a filter when:
- You want a consistent style across clips.
- You’re going for a specific mood or tone.
- The original footage needs a creative boost.
Skip the filter when:
- The lighting and colors already look good.
- You’re filming products or professional content.
- You’re aiming for realism or documentary-style clarity.
If you’re unsure, try this: apply the filter, then toggle it off. If the video still looks great without it, maybe you don’t need one. Or try enhancing the footage with a tool like GStory’s AI Video Enhancer instead—it’ll bring out the best in your footage without adding anything unnecessary.
Final Thoughts: Let the Content Lead the Look
It’s easy to get carried away with filters. They’re fun, they’re trendy, and they’re everywhere. But your best videos won’t be remembered because of a filter—they’ll stand out because they were clear, well-paced, and easy to watch.
So use filters with intention. Choose one that matches your story, your brand, or your mood. And don’t be afraid to skip them entirely when your footage already shines.
If what you really need is better lighting, smoother color, or sharper quality—not a new “vibe”—you might be better off skipping filters altogether and giving your video a quiet, powerful upgrade instead.
You can try that kind of enhancement using GStory’s AI Video Enhancer—no downloads, no filter library to scroll through, just cleaner, clearer video in one click.