Last Updated on November 11, 2025 by Leslie
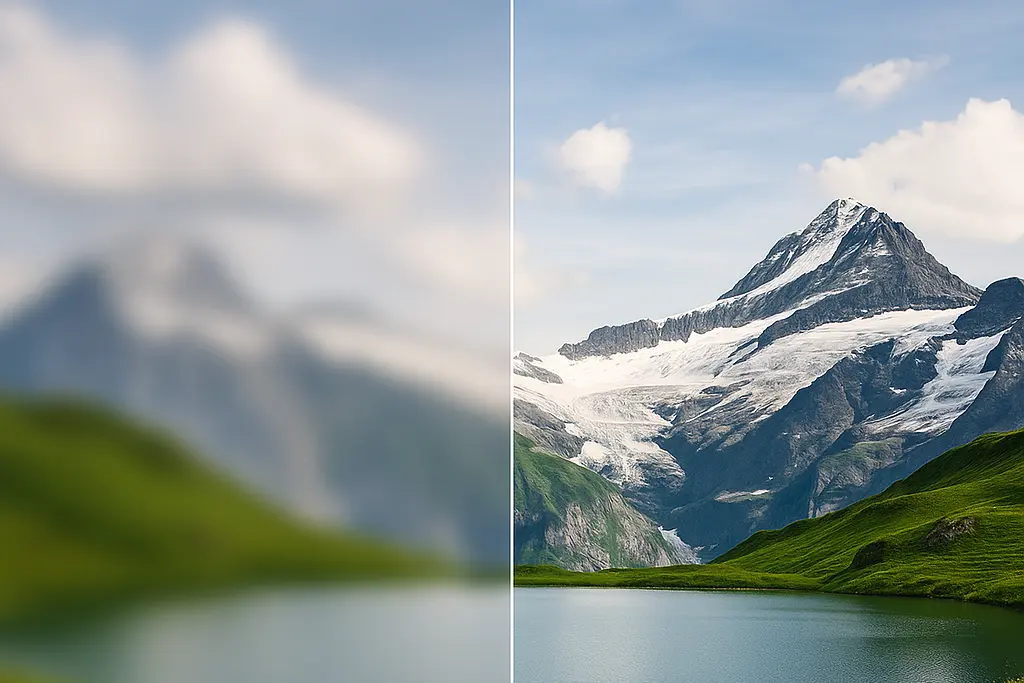
Have you ever captured the perfect moment—only to realize your photo is blurry when you check it later? It’s one of the most frustrating experiences for anyone who loves taking pictures. Whether it’s a vacation photo, a portrait, or an old memory, a blurred image can ruin an otherwise great shot.
The good news is that modern technology, especially AI-powered image blur removers, can fix this problem in seconds. You don’t need to be a professional editor or own expensive software. In this guide, you’ll learn how to remove blur from photos online for free, understand why pictures become unfocused, and discover the best ways to bring your images back to life.
Why Do Photos Become Blurry?
Before fixing a blurry picture, it helps to know why it happens. Most of the time, blurriness isn’t caused by one single reason but by a mix of small issues. Here are some of the most common causes:
1. Camera Shake or Motion Blur
If your hands move while taking a photo—especially in low light—the camera captures that movement as blur. Even a tiny shake can make the image look soft or smeared.
2. Wrong Focus
Sometimes the camera focuses on the background instead of the subject. When this happens, your main object appears out of focus while everything behind it looks sharp.
3. Low Light or Slow Shutter Speed
In dark environments, cameras use longer exposure times to let in more light. Any motion during that time—either from your hand or your subject—creates blur.
4. Compression or Image Resizing
Uploading or downloading images from social media can also cause blurriness. Apps often compress photos to save space, which removes small details.
Even though there are many reasons your photo might look blurry, the right tools can now help you fix it—thanks to advances in AI-based blur removers.
Can You Really Unblur a Photo?
This is one of the most common questions people ask: Can you actually make a blurry picture clear again?
The short answer is yes—but with limits.
Traditional photo editors like Photoshop or Lightroom use sharpening filters that enhance edges and contrast. This can improve clarity slightly but won’t truly “recover” lost details.
AI-powered blur removers, on the other hand, use machine learning models trained on thousands of photos to predict what the missing pixels should look like. They analyze patterns, textures, and colors to restore lost sharpness.
So while they can’t perform miracles on extremely low-quality or overexposed images, they can make most everyday blurry photos look much clearer—especially portraits, landscapes, or text-based images.
In short, AI blur removers don’t just “sharpen”; they reconstruct.
Best Ways to Remove Blur from a Photo Online (Free Methods)
You don’t need expensive desktop software anymore. Today, there are many easy and free ways to remove blur from photos online. Here are the three most popular methods:
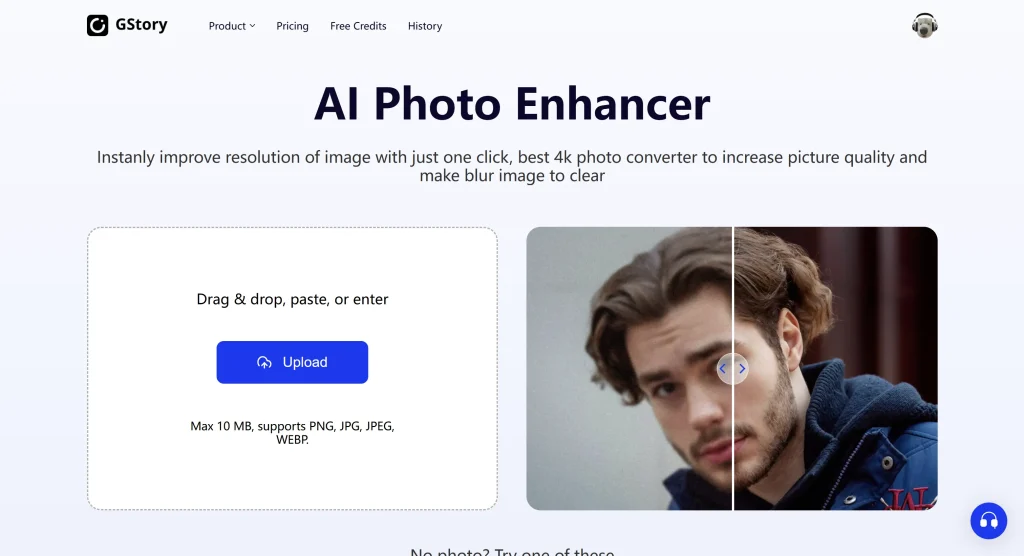
1. AI Blur Remover Tools (Online & Free)
AI blur removers are the easiest option for beginners. You simply upload your blurry photo, click “Unblur” or “Enhance,” and let the AI do its job. Within seconds, you get a sharper, cleaner version—no manual editing required.
These tools work best for:
- Portraits or selfies that are slightly out of focus
- Screenshots or text images that look fuzzy
- Old scanned photos
Most platforms are free to try, and results are instant. This makes them perfect for anyone who wants a quick, no-hassle fix.
2. Manual Sharpening with Photo Editors
If you prefer more control, traditional editors like Photoshop, GIMP, or Lightroom can also help. Look for tools like “Sharpen,” “Clarity,” or “Dehaze.”
However, manual editing requires some experience. If you apply too much sharpening, your image may look grainy or unnatural. A good rule is to increase sharpness slowly and compare before/after results as you go.
3. Mobile Apps for Quick Fixes (iPhone & Android)
If your photo is stored on your phone, you can fix it without transferring it to a computer. Many photo editing apps now include “Unblur” or “Enhance” features powered by AI.
For example, on an iPhone, you can use built-in tools like Auto Enhance, or third-party apps that include blur removal. Android users can also find similar tools in the Play Store.
Whether you’re using desktop or mobile, the idea is the same: upload → unblur → download.
Step-by-Step Guide: How to Fix an Unfocused Image
Let’s walk through a simple, step-by-step process that works on most AI image blur remover tools:
Step 1: Upload Your Blurry Photo
Choose the photo you want to fix. High-resolution images work best since they contain more data for the AI to analyze.
Step 2: Select the “Unblur” or “Enhance” Option
Once uploaded, look for options like “Unblur,” “Fix Focus,” or “Enhance Details.” These trigger the AI enhancement process.
Step 3: Adjust the Settings (If Available)
Some tools let you control sharpness, clarity, or denoise levels. Move the sliders gently until the result looks natural.
Step 4: Preview and Compare
Always check the “before and after” preview. The best results make your photo clearer without losing its original tone or lighting.
Step 5: Download the Fixed Image
When you’re satisfied, save your new photo. Many online tools allow free downloads in high quality.
You’ve now turned your blurry shot into a sharp, shareable image—without professional editing skills.
Tips to Avoid Blurry Photos in the Future
While it’s great that AI tools can help, prevention is still better than repair. Here are a few simple tips to keep your photos sharp from the start:
1. Use a Stable Grip or Tripod
Camera shake is the biggest cause of blur. Hold your camera with both hands, keep your elbows close to your body, or use a tripod for steady shots.
2. Lock Focus Before Shooting
Tap on your subject to set focus before pressing the shutter. Most smartphones let you lock focus by holding down the screen for a second.
3. Increase Shutter Speed
When shooting in low light or with moving subjects, increase the shutter speed. This reduces the chance of motion blur.
4. Use Burst Mode
Take multiple shots in quick succession. At least one will usually be sharp and well-focused.
5. Shoot in RAW Format
If your camera supports it, shoot in RAW rather than JPEG. RAW files retain more detail, which makes it easier to sharpen them later. (So yes — it’s usually better to sharpen in RAW than in JPEG.)
6. Clean Your Lens
Sometimes the problem isn’t motion or focus—it’s dust or fingerprints. Keep a microfiber cloth handy for quick cleaning.
FAQs About Unblurring Images
How can I fix an unfocused image?
You can use an AI blur remover or photo editor to automatically detect and enhance edges, restore lost details, and make your image look naturally sharper in seconds.
Is it possible to sharpen a blurry image?
Yes. Sharpening tools enhance contrast and edges, while AI-powered algorithms rebuild missing pixels, giving your blurry image a clearer, more realistic appearance without overexposure or grain.
Can I unblur a photo on my iPhone?
Absolutely. You can use built-in options like Auto Enhance or download AI photo apps that unblur, denoise, and improve clarity directly from your camera roll.
Can AI fix out-of-focus photos?
AI can detect focus issues and use deep learning to reconstruct image sharpness. While it can’t fix extreme blur, it significantly improves moderately unfocused photos.
How do I convert a blurry picture to clear?
Simply upload your image to an online unblur tool, apply the “Enhance” feature, and preview the results. AI instantly restores lost texture, focus, and definition.
Can I enhance blurry photos for free?
Yes. Many AI blur remover platforms offer free trials or limited versions that allow you to unblur and enhance photos online without downloads or watermarks.
Is it better to sharpen in RAW or JPEG?
Sharpening in RAW preserves more data and detail, making edits smoother. JPEGs are already compressed, so sharpening can exaggerate noise and reduce image quality.
Final Thoughts
Blurry photos are no longer the end of the story. With AI-powered image blur removers, anyone can bring lost memories back into focus—quickly and for free.
Whether it’s an old family picture, a product shot for your website, or a selfie that didn’t turn out right, these tools make it easy to remove blurriness from images and restore clarity in seconds.
AI isn’t magic, but it’s getting close. It can’t fix every photo perfectly, but it can give you a version that looks sharper, cleaner, and more professional.
So next time your camera slips or your subject moves too fast, don’t panic. Just upload your picture, click “Unblur,” and let technology handle the rest.
Your photos deserve a second chance—and with the right blur remover, they can look clearer than ever before.
Leave a Reply